
To assemble your Purple Leaf outdoor patio chaise lounge correctly, start by confirming your exact model number on the instruction sheet (look for a line that reads something like 'Models: ZY04-CLS03 Patio Chaise Lounge' or 'Chaise Lounge (XJ)'), verify every part and hardware piece against the included checklist before you touch a tool, then build the frame loosely first, get everything aligned, and only fully tighten hardware after all steps are complete. That single rule, loosen now, tighten last, prevents the majority of wobble and misalignment problems people run into.
Purple Leaf Outdoor Patio Chaise Lounge Assembly Instructions

Grant Hollis
13 May 2026
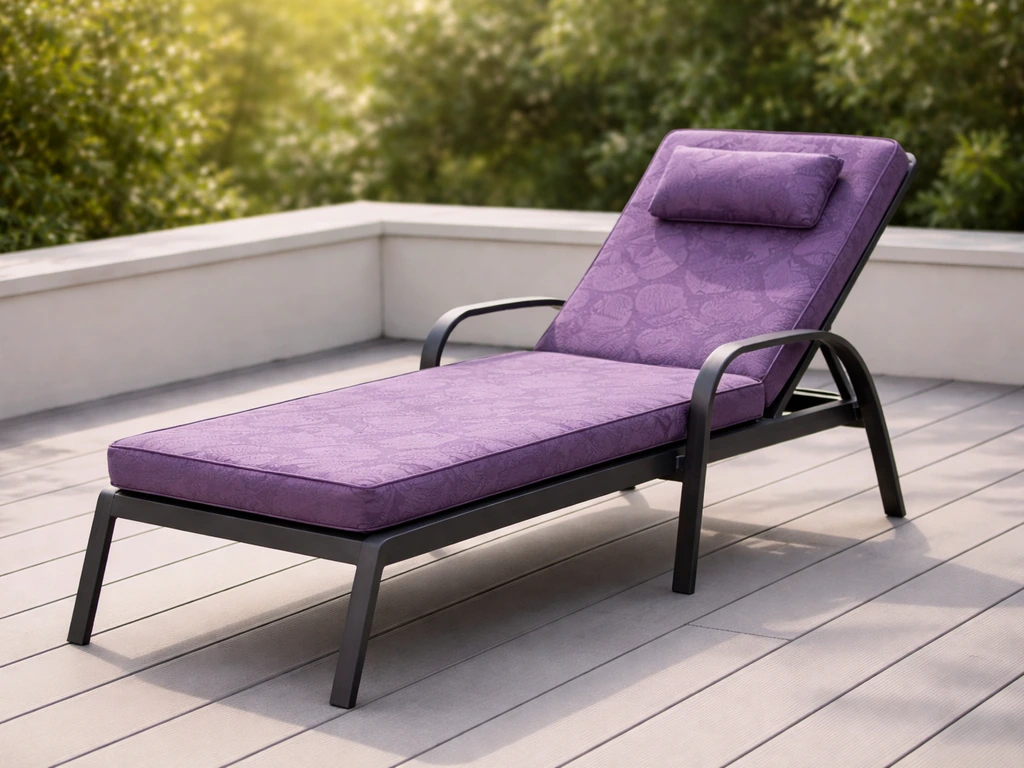
Identify your exact model before you do anything else
Purple Leaf makes more than one chaise lounge design, and the assembly steps, hardware sizes, and parts layout differ between them. The two most commonly referenced models are the ZY04-CLS03 (sold through Purple Leaf's own channels and Amazon) and the Chaise Lounge (XJ) (which appears in Home Depot's product documentation). These are not assembled the same way, and the hardware packs are not interchangeable.
Flip to the first or second page of your instruction sheet. If you are comparing patio sets instead, look up mainstays albany lane 6 piece outdoor patio dining set reviews for real buyer feedback before you order. You're looking for a 'Models:' line or a title that reads 'Assembly and Operation Guide' with the model code printed nearby.
Write that code down. If you downloaded your manual from a third-party site or lost the paper copy, check the box itself, the sticker on the underside of the frame, or the original order confirmation email. Purple Leaf's product pages on Amazon and Home Depot also list the model code in the product details section. Matching your code to the correct PDF before you start saves real time.
Parts list: what should be in the box
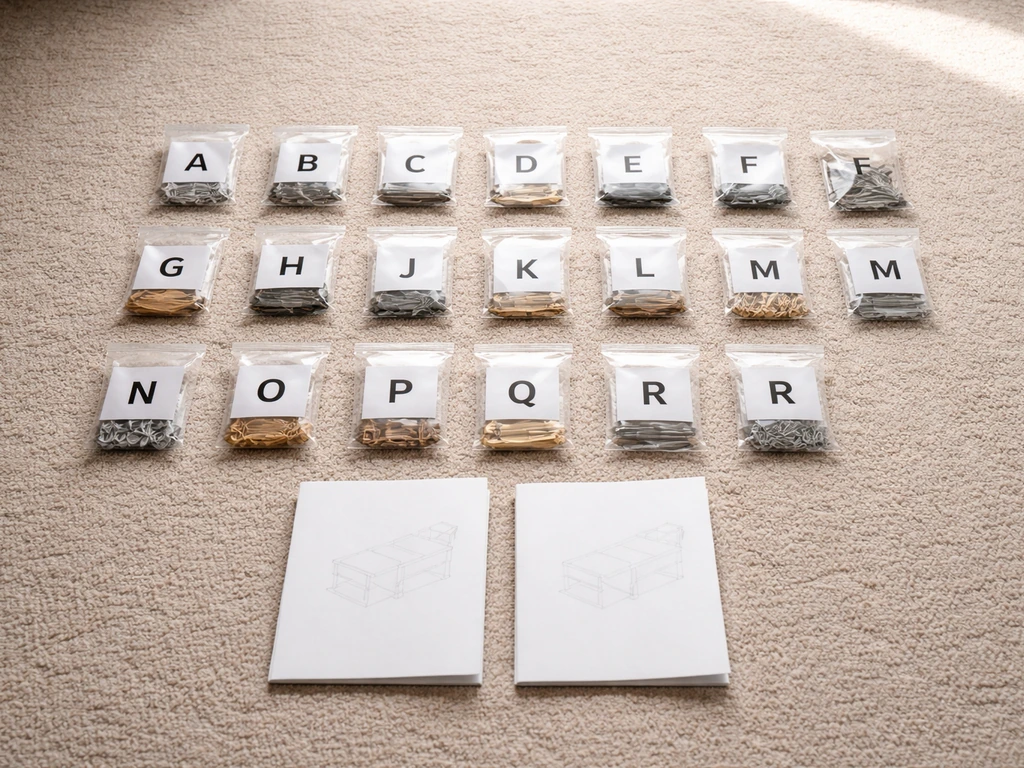
Both manuals use lettered components (A, B, C, D, E, F, G, H, J, K, L, M, N, O, P, Q, R) with quantity counts printed next to each item on the checklist page. The Chaise Lounge (XJ) guide, for example, calls out quantities like 'J x56' and 'M x32' for specific hardware pieces. That level of specificity matters because the hardware is not one-size-fits-all. The XJ guide lists at least five distinct bolt sizes: M6×1×12, M6×1.5×18, M6×15, M6×35, and M6×80. Using the wrong length fastener in a given joint is one of the most common mistakes people make, and it either strips the threading or leaves the joint structurally loose.
Before you open any hardware bags, lay every part on a flat surface (a soft rug or carpet is ideal, more on that below) and cross-check each item letter and quantity against the checklist in your manual. The XJ guide explicitly states: 'Make sure you have all the parts and hardware as the item list shows.' If a count is off, stop there. Do not begin assembly with a missing piece, because you may find out midway through that the missing part was structural.
Tools you need and how to set up safely
Purple Leaf chaise lounges are typically designed to be assembled with basic hand tools. Most models include a hex key (Allen wrench) in the hardware pack, which handles the majority of fasteners. You will also want a rubber mallet for persuading frame joints that fit tightly without damaging the finish, and optionally a cordless drill with a hex bit if you want to save time on the higher bolt counts (the XJ model uses 56 of one fastener type alone). Do not use a power driver to fully tighten, though, since the soft aluminum threading on these frames strips easily.
- Hex key set or the included Allen wrench (most fasteners are M6 metric hex)
- Rubber mallet
- Cordless drill with hex bit (optional, for speed during loose-fitting stage only)
- A second adult (the ZY04-CLS03 manual specifically recommends two people for installation)
- Carpet, rug, or moving blanket to work on (prevents scratches to the frame finish)
Set up your workspace on a carpet or soft surface as the ZY04-CLS03 manual recommends, and stage all parts in roughly the order they will be assembled before picking up a single tool. Clear at least six feet of space on all sides. If you are working outdoors on concrete, lay down a moving blanket. Powder-coated steel and aluminum frames scratch easily on hard surfaces, and a surface scratch becomes a rust start point within a season.
Step-by-step assembly: frame, seat, and cushions
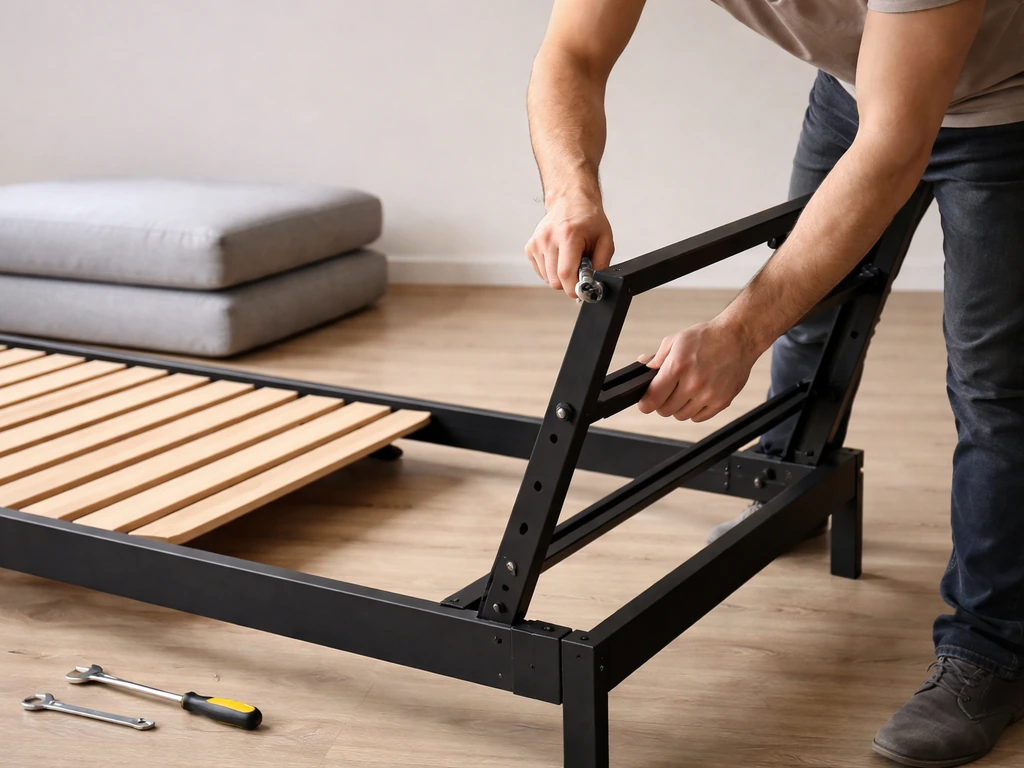
These steps follow the general sequence used across both Purple Leaf chaise lounge models. Your specific manual may reorder a sub-step slightly, so use this as a framework and cross-reference your diagram for exact joint positions.
- Identify all lettered frame parts (main frame rails, back frame, armrests if applicable, leg assemblies) and group them by letter before touching hardware.
- Attach the rear legs to the main seat frame first. Insert the bolts finger-tight only using the correct bolt length for that joint as shown in your checklist.
- Attach the front legs to the seat frame, again finger-tight. At this point the frame should stand on its own but feel loose, which is intentional.
- Connect any crossbar or stabilizer rails between the legs. These are typically the components labeled with letters like C or D in the parts diagram. Use the correct shorter bolts here, as the longer M6×80 bolts are reserved for frame-to-frame pivot points.
- Attach the reclining back frame to the seat frame at the pivot hinge point. This joint usually uses the longest bolt in the pack (M6×80 or M6×110 depending on model). Insert but do not tighten.
- Install the back support rods or slat crossbars across the backrest frame if your model uses them. Thread these through the pre-drilled holes and secure loosely.
- Fit the armrests (if included) onto the side rails of the seat frame. These often slide into a channel and are secured with two or three bolts per side.
- Install the reclining adjustment mechanism. Most Purple Leaf lounges use a notched bar or a pin-lock system on the back frame. Make sure the bar seats properly in its bracket before tightening the pivot bolt.
- Perform a dry-fit check: sit on the frame lightly, recline the back through its positions, and look for any gaps, misaligned holes, or joints that do not sit flush. Correct any issues now while bolts are loose.
- Once you are satisfied with alignment, go back to every joint in the order you assembled them and tighten fully. Work from the legs upward toward the backrest pivot last.
- Place the cushions or attach the fabric sling (depending on your model) and verify the recline mechanism clicks into each position cleanly.
The most important principle here is the one the ZY04-CLS03 manual states directly: do not fully tighten screws until each step is finished. Tightening as you go locks joints into positions that may not be perfectly aligned, and you end up with a finished product that wobbles or has a back that does not recline smoothly because one pivot joint was forced closed before its neighbor was in position.
Common assembly problems and how to fix them
Wrong bolt in the wrong hole
With five different bolt lengths in the hardware pack, grabbing the wrong one is easy. If a bolt bottoms out before the joint closes flush, it is too long. If you can spin it freely without it catching threads, it is too short or you have a wrong-diameter piece. Pull it out, check your manual's hardware table for that step, and match the measurement printed there (M6×15 for a shallow joint, M6×80 for a deep pivot, etc.). Never force a bolt that is not threading smoothly.
Holes that do not line up
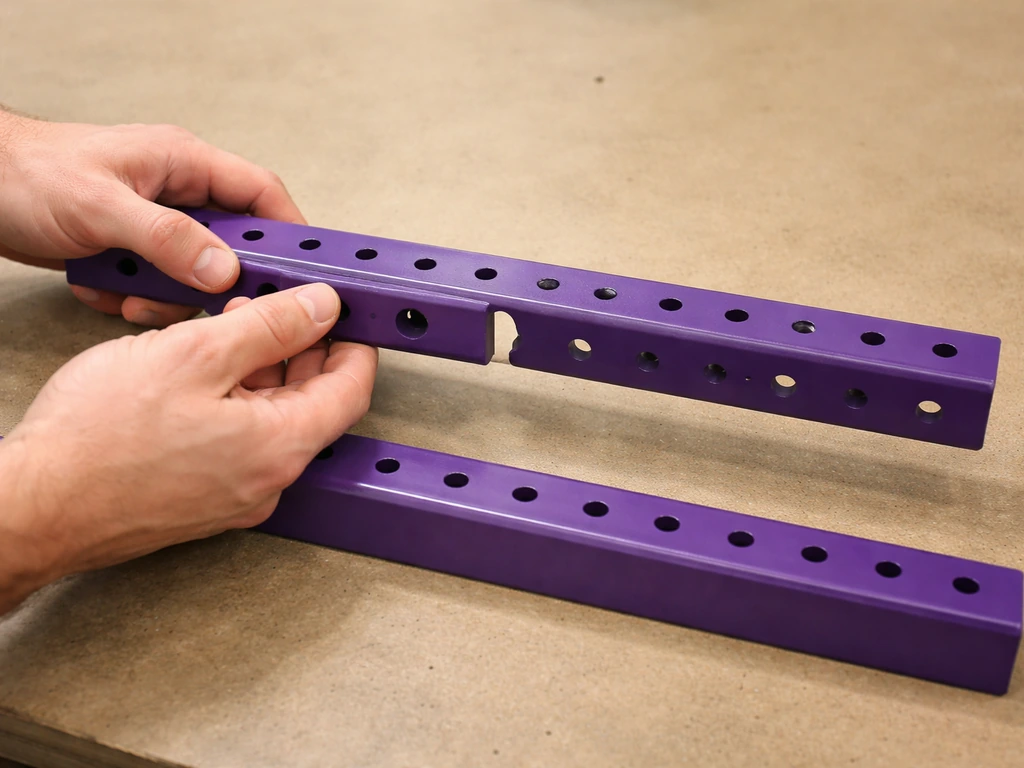
Misaligned holes almost always mean a frame part is oriented the wrong way, not that the part is defective. Purple Leaf frame rails are often visually symmetrical but have offset hole patterns, so flipping a rail 180 degrees makes it look right but puts the holes off by several millimeters. Check the part letter against your diagram and compare which face has the larger or smaller hole (pivot holes are usually wider than hardware holes). Flip the part, and the holes will align.
Missing parts
If your count is off after checking the parts list, check the box thoroughly, including underneath any cardboard inserts, before concluding something is missing. Small hardware like washers and end caps hide in the corners. If a part is genuinely absent, photograph the parts list page, the hardware bag, and the box label (showing the model code and order number) before contacting Purple Leaf support. Their warranty covers free replacement parts including shipping within the 1-year coverage window, so this is a solvable problem without purchasing anything additional.
Back frame does not recline smoothly
If the reclining mechanism feels stiff or skips positions, the pivot bolt at the hinge is usually over-tightened. Loosen it a half-turn and test again. The pivot should rotate freely while still feeling solid. On notched-bar models, also check that the adjustment bar is seated fully in its bracket and that nothing is pinched between the bar and the frame rail.
Frame wobbles after full tightening
A wobble after final tightening usually means one leg is slightly off the ground because the frame was tightened while sitting on an uneven surface. Loosen the leg bolts (not the pivot hardware), move the chaise to a flat surface, let the frame settle naturally, then re-tighten. If the wobble persists on a flat surface, loosen the crossbar hardware and check that the crossbars are fully seated in their brackets before tightening again.
Hardware check, tightening order, and leveling
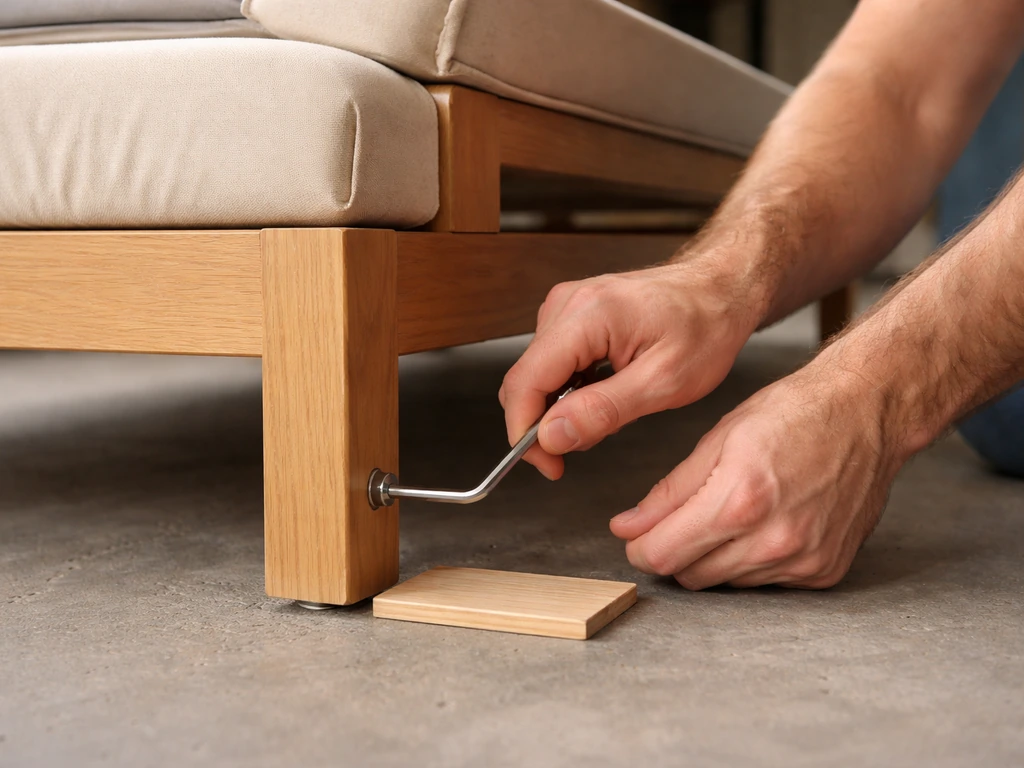
After your first full assembly, go back around every bolt one more time with the hex key before you use the chaise for the first time. The XJ manual says it plainly: 'Check all bolts for tightness before use, and periodically check and tighten bolts to ensure your chair works properly.' Bolts that felt snug during assembly can back off slightly as frame parts settle into their positions.
For tightening order, always work from the base up: front legs first, rear legs second, crossbar stabilizers third, armrests fourth, and the backrest pivot joint last. Tightening the pivot last ensures the full structural weight of the frame is already settled before you lock the most-used moving joint in place.
For leveling, place the assembled chaise on the surface where it will actually live and check all four feet. Outdoor pavers and decking are rarely perfectly level. If one foot floats, most Purple Leaf leg assemblies accept rubber foot caps that can be shimmed with a rubber pad or a thin plastic disc. Do not shim with wood outdoors, as it absorbs moisture and compresses over a season, leaving you with the same wobble returning by spring.
Keeping it in good shape after assembly
Purple Leaf chaise lounges use powder-coated steel or aluminum frames with either fabric sling seating or removable cushions. If you are comparing patio sets before you buy, reading mainstays patio furniture reviews can help you spot which brands and materials tend to hold up best outdoors. Both need a little routine care to hold up well through seasons of outdoor use.
Cleaning and drying
The XJ manual specifically calls out cleaning and drying the chair after rain. That is the single most important thing you can do for longevity. Water sitting in bolt recesses and frame tube ends is where surface rust starts on steel frames. After rain, wipe down the frame with a dry cloth, tip the chaise to drain any water pooled in hollow frame sections, and leave it in a position that allows air circulation around the joints.
Cushion care
Most Purple Leaf cushion covers are removable and machine washable on a gentle cycle. Check your specific model, but in general, spot-clean with mild soap and water for routine use and remove covers for a full wash at the start and end of the season. Never store wet cushions, as mildew sets in within 48 hours in warm weather and the smell does not come out easily.
Off-season storage
Both the ZY04-CLS03 and XJ manuals give the same instruction on storage: cover the chair when not in use, and bring it indoors or into a covered space if it will sit unused for an extended period. The ZY04-CLS03 manual specifically says to store the product indoors when not in use. A furniture cover handles typical seasonal weather, but if you live somewhere with hard winters or extended rainy seasons, actual indoor or garage storage makes a real difference in how the frame and hardware hold up over multiple years. Periodic bolt checks every few months (especially after the first season) also prevent the gradual loosening that makes outdoor furniture feel cheap faster than it should.
Rust prevention on hardware
If you start to see surface rust forming on bolt heads or joint areas, address it early. A light application of clear rust-inhibiting spray or silicone-based lubricant on the hardware keeps moisture out of threads. Once rust gets into the threading on a metric bolt, it is very hard to remove without damaging the surrounding material.
Warranty coverage and when to contact support
The ZY04-CLS03 warranty covers frames, fabric, bolts, nuts, and cushions for 1 year from the date of purchase. During that window, Purple Leaf will send replacement parts at no cost to you, including shipping. That is a genuinely useful policy, especially for hardware issues discovered during assembly.
There are two conditions worth knowing: the warranty applies to the original purchaser only (it is non-transferable), and you will need your order number to file any claim. Keep your order confirmation email accessible. If you bought through Amazon, the order number is in your order history. If you bought through Home Depot, it is on your receipt or in your account order history online.
Contact Purple Leaf support if you have a missing part that was not found in the box, a part that arrived bent or cracked, hardware that does not match the sizes listed in the manual, or a structural issue you cannot resolve through reassembly. Do not try to substitute hardware from a hardware store unless you have confirmed the exact metric thread pitch matches, because Purple Leaf's metric fasteners use specific pitches (note the difference between M6×1 and M6×1.5 thread pitches in the XJ manual) and a mismatched replacement will strip the frame threading.
If you are researching Purple Leaf more broadly before or after purchase, the brand's full outdoor furniture lineup, including dining sets and lounge chairs, gets into durability and real-world performance in dedicated Purple Leaf patio furniture reviews. And if you are comparing assembly complexity across brands, it is worth knowing that similarly priced sets like Mainstays patio furniture lines handle assembly quite differently, with their own specific instruction formats and hardware systems.
Mainstays Albany Lane 6 piece outdoor patio dining set instructions are different from chaise lounge guides, so follow the specific step order and parts list for your exact set Mainstays patio furniture lines. If you want a quick way to gauge what to expect before buying, you can also look at mainstays patio furniture reviews for real-world assembly and durability feedback Mainstays patio furniture lines.
If you are also shopping for Mainstays Albany Lane 6 piece outdoor patio dining set reviews, check how the hardware, instructions, and build quality compare to your Purple Leaf chaise lounge setup.
FAQ
How do I confirm I have the right hardware pack for my exact Purple Leaf chaise model?
Match the model code from your manual to the sticker or label on the underside of the frame, then compare the hardware letters and quantities on the checklist before opening bags. If your bags do not show the same letter set and counts listed for that model, stop and request the correct pack instead of substituting fasteners.
What should I do if a bolt threads in a little, then stops suddenly?
Do not force it. Back the bolt out, confirm you are using the correct length and diameter for that specific joint, and check whether the frame hole is partially blocked by powder-coat buildup or a misaligned mating part. Re-align the joint and try again with hand pressure only.
Should I use Loctite or thread-locker on the bolts?
Avoid thread-locker unless your manual specifically allows it. Purple Leaf uses metric bolts that can be tightened and periodically re-checked, thread-locker can make future maintenance difficult, and it can also affect how easily hardware backs out for adjustment if something is misaligned.
My chaise reclines but feels uneven or “stutters” between positions, what’s the first thing to check?
Loosen the hinge pivot hardware by about a half-turn and test the recline motion. Also confirm the adjustment bar is fully seated in its bracket and not pinched, because pinching can create friction that feels like a mechanism skip.
Is it okay to assemble on grass or dirt to avoid scratching the frame?
It’s better to assemble on carpet, a moving blanket, or another flat, stable soft surface. Uneven ground can cause the legs to tighten while one foot is floating, which leads to wobble and incorrect alignment later, even if the frame looks straight initially.
How can I tell if wobble is coming from the feet or from a structural crossbar alignment issue?
Place the assembled chaise on a flat surface, then press gently near each corner leg to see where movement changes. If it persists after the frame has settled, loosen crossbar stabilizer hardware and verify the crossbars are fully seated in their brackets before re-tightening.
Can I replace missing bolts with any M6 fastener from a hardware store?
No, even if the bolt looks like M6, the thread pitch must match. The XJ instructions distinguish similar sizes (for example, M6×1 versus M6×1.5), and using the wrong pitch can strip the frame threading, so request replacement parts from Purple Leaf if anything is missing or wrong.
What if the reclining hinge feels loose after assembly, but tightening more makes it stiff?
Re-check that you tightened bolts in the recommended order and that the pivot joint was tightened last after the frame settled. Then fine-tune only the hinge pivot, in small increments, aiming for free rotation without wobble. If you still cannot balance both, stop and inspect for mis-seated hinge components.
How often should I check bolts after the first build?
After the initial “first-use” re-check, do periodic checks every few months, especially after the first season or after large weather swings. Outdoor humidity and temperature changes can cause frames to settle and hardware to loosen slightly.
What’s the best way to handle rust that starts on bolt heads but the rest of the hardware looks fine?
Address it early by cleaning and applying a clear rust-inhibiting spray or silicone-based lubricant on the hardware. If rust has reached the threads and the bolt becomes difficult to thread, plan on replacement rather than repeatedly forcing it, because the surrounding frame can get damaged.
How should I store the chaise to prevent mildew on cushions and rust inside the frame?
Keep cushions dry, remove and wash covers only when they are fully dry before storage, and bring the chaise into a covered or indoor space for extended periods, not just under a thin outdoor cover. After rain, tip the chaise to drain pooled water in hollow frame sections and allow airflow around joints.